Michael’s is a dangerous place.
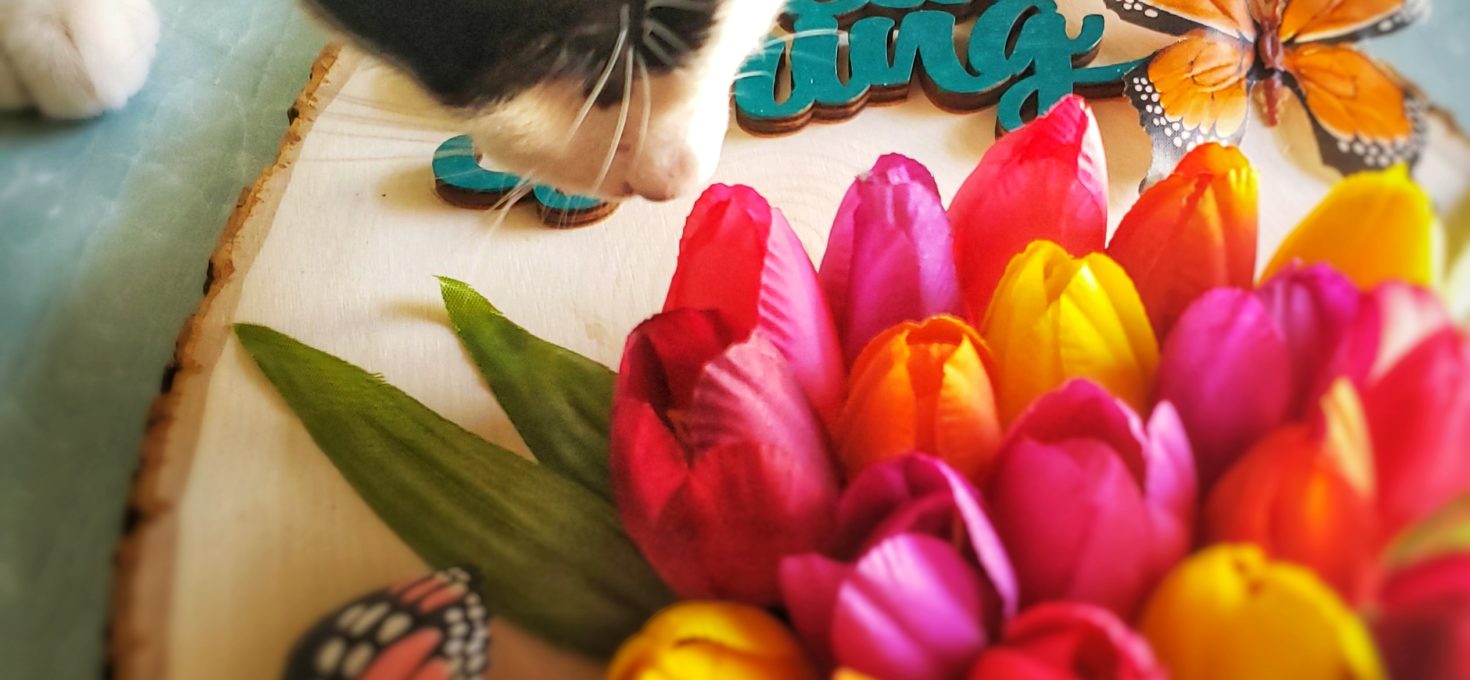
Just walking down the aisles gives me so many baking and crafting ideas. I have to exercise tremendous self-restraint not to buy all of the supplies. That’s what happened when I found inspiration for this adorable “Hello Spring” sign. I had more supplies in my basket than I would possibly need for this project! I ended up thinking it all through and putting a few things back, which I consider a real accomplishment. 🙂
That said, feel free to customize this craft according to your preferences. Don’t like tulips? Use roses instead! Don’t like butterflies? You don’t need ’em!
Another customization note: I used a “Hello Spring” wood cutout that I found in the floral section. Unfortunately I couldn’t find a link to this on their website or on Amazon, so if you can’t find this product then you have several options. Look for a stencil to trace, paint the letters on by hand, or buy individual wood letters to spell out “Hello Spring.” That was actually my original plan until I found the cutout. I know they sell wood letters at Michael’s.
(This post contains affiliate links. I may receive a small commission, at no cost to you, if you make a purchase through a link. My full affiliate disclosure and privacy policy is available here.)
What You’ll Need:
wood plaque (like this one from Michael’s)
wood watering can cutout
“Hello Spring” wood cutout (see notes above)
assorted fake flowers
wire cutters (if your flowers have stems)
various colors of paint (I used teal, purple, silver and green puff paint)
clear gloss varnish
paint brushes
paper towels
cup of water
butterflies (again I recommend checking the floral section at Michael’s)
quick dry glue
optional: a hanging mount
Start by painting the wood letter cutouts (if you’re using them) and the watering can. You’ll probably need several coats of paint. (I did three coats.) Let one coat dry before adding another. I recommend using very small brushes for the details on the watering can.
If you’re painting the letters on, start there!
Prepare the flowers while the paint is drying. Pull the flowers off the stems, using a wire cutter to trim anything you can’t easily pull off.
If you’re interested in hanging the sign on the wall, and your wood plaque doesn’t already have a mount attached, this is the time to attach one. When I started this project I didn’t plan on hanging my sign on the wall. I changed my mind after I started gluing the flowers on. It is VERY hard to attach the mount to the back after everything is glued on, because you don’t want to flatten the flowers! So don’t be like me. Attach it now!
Once the paint is dry, glue the letters and the watering can onto the wood plaque. I also glued a butterfly next to “Hello Spring.” The butterflies came from the floral section, so they also had stems that I needed to cut off.
The butterfly is a little tricky to glue on. Hold it down for a few seconds to help secure it and make sure it’s completely dry before moving on to the next step.
Gluing the flowers on is the hardest part, especially if they had stems. Even if you cut the stems completely off there might still be a little nub where the stem was. Only glue one row of flowers at a time. Don’t glue on the next until the first is dry.
You can also add leaves to give the bouquet more texture.
Once the flowers are dry, add any additional butterflies that you want.
And you’re done! Hang this on the wall, or lean it against something. If you used quick dry glue then everything should be secure.
Tag me @rosesandwhiskers on Instagram if you try it, and use the hashtag #rosesandwhiskers. Happy crafting! 🙂


This is so creative and perfect decor for spring ❤️😍
Thank you, Christine! And it’s fun to make. 🙂